➤ Timely measure the distance between itself and Anchor to provide software positioning
➤ Report location packets regularly
➤ Send an emergency message
➤ Receive software commands for buzzer and LED operation
➤ Obtain various sensor values, such as height, g-sensor, heart rate, strap disconnection, etc.
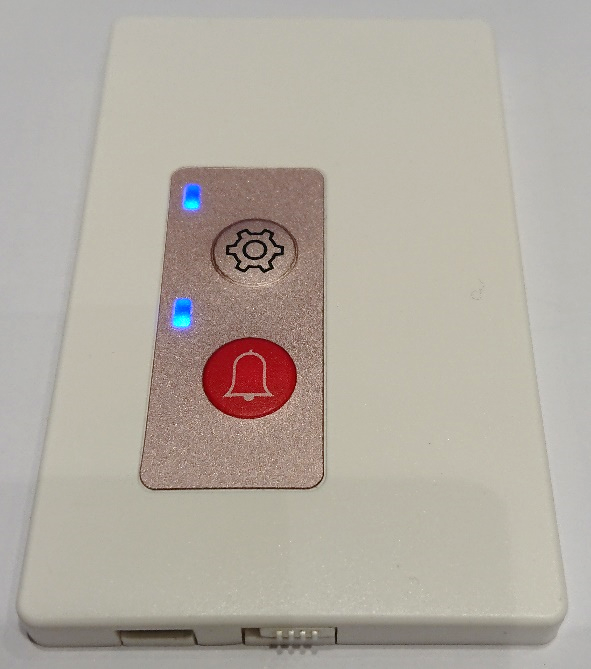
Card Type - UTAG-9056 / UTAG-9056_PA
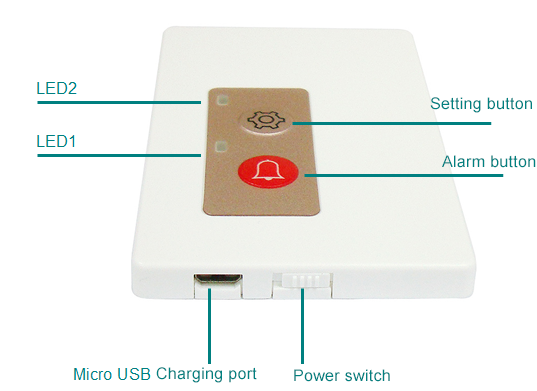
Alarm Button: custom setting such as emergency call out or alarm function
Setting Button: To enter the setting mode. First, switch off the device. Next power up the device again but hold the setting button, once there is constant blue light let go of the setting button, it now enters setting mode.
LED1: Power on, Signal Transmit and setting mode indication
LED2: A fully illuminated indicates (Red: charging, Green: fully charged). Software control indicator (based on the function of the software)
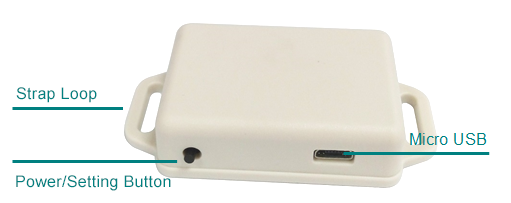
Micro USB: Charging and firmware updates
Power Switch: Powering ON/OFF device
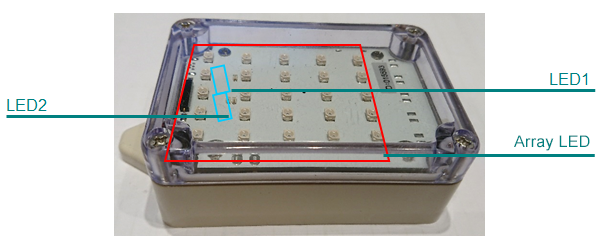
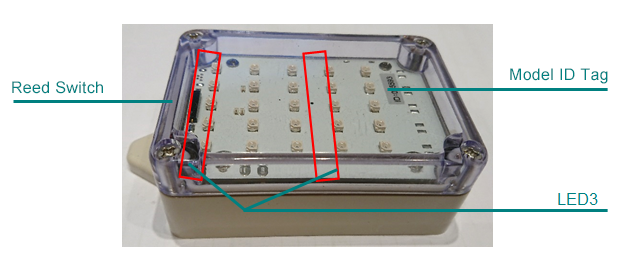
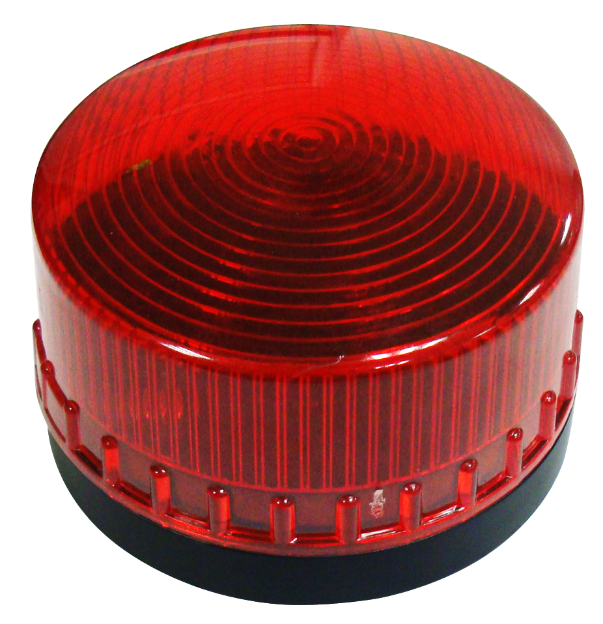
Acousto-optic Type - UTAG-7045
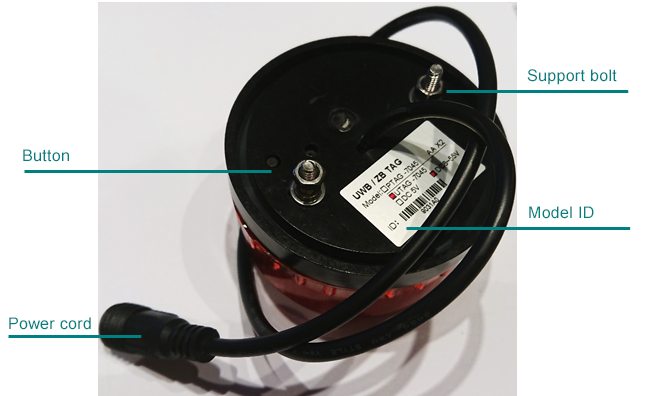
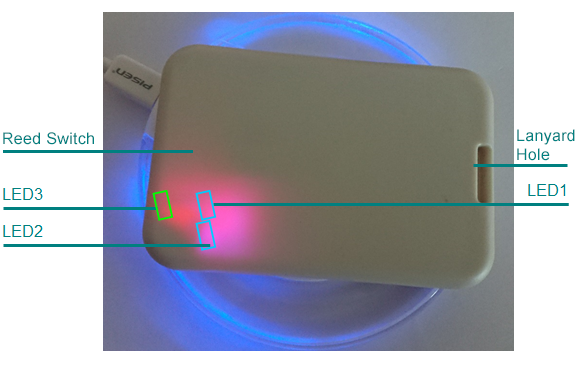
Magnet
Micro USB cable: Inner battery power supply and firmware updates
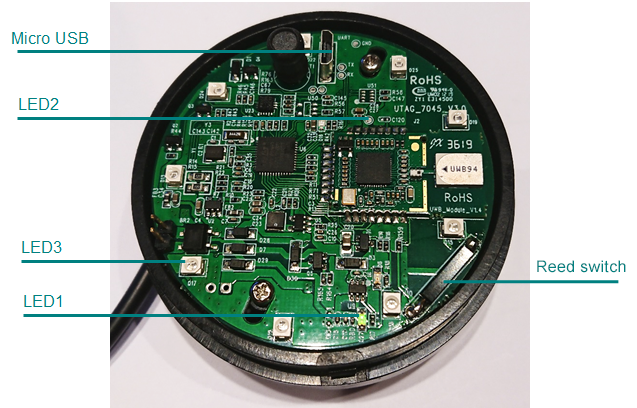
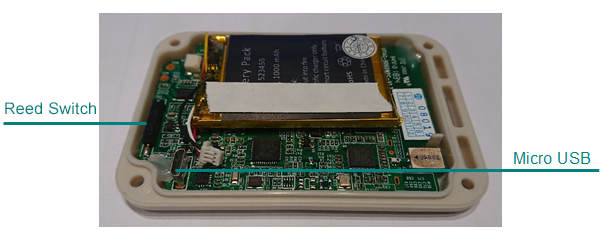
Reed switch:UTAG-7045 uses magnet to turn it on and off. You can also use the button below the device. If magnet is close to the magnetic reed switch, LED3 will light up; if magnet is moved away, it will light off.
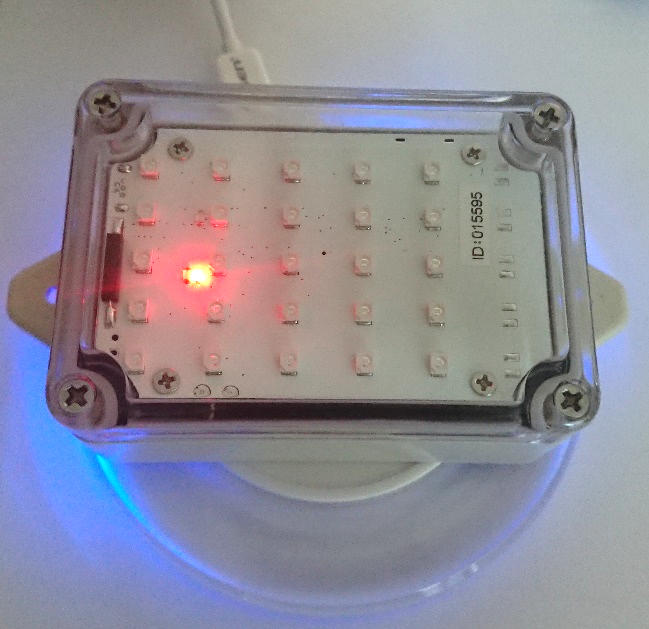
➤ Power ON: Bring the magnet close to magnetic reed switch. After approximately 5 seconds the LED2 light will flash 3 times with a 0.5 second interval, this indicates that Tag has entered Power ON mode, the buzzer will also buzz for 3 times with a 0.5 second interval (3“beeps”)
➤ Power OFF: Power OFF requires the use of usb_dongle. Bring the magnet close to the magnetic reed, the device would be switched off after 5 seconds, the buzzer would buzz for 5 “beeps” with 0.2 second interval. LED2 light would flash for 5 times.
➤ Setting: Under Power ON mode, bring the magnet close to the magnetic reed until LED2 constantly lights, it now enters Setting. Bring the magnet close to the magnetic reed again to leave Setting. If the device is not operated within the next 20 second, it would leave Setting automatically
➤ Button:Power On/off machine, Setting, operating instruction same as above for magnetic reed. Emergency Alert.
LED1:Power indicator
LED2:On/off machine, signal transmitting and setting mode indicator
LED3:Magnetic weed switch indicator, software controlling light signal (shown according to software function). Remote control possible with software.
Power cable:DC 12V (can be 7~28V Input)
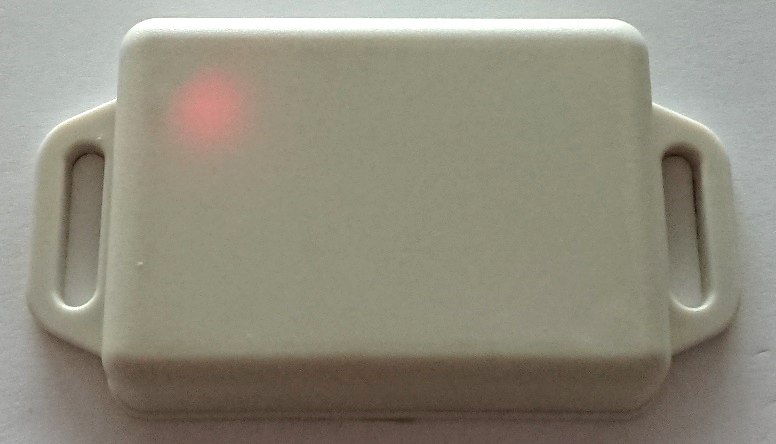
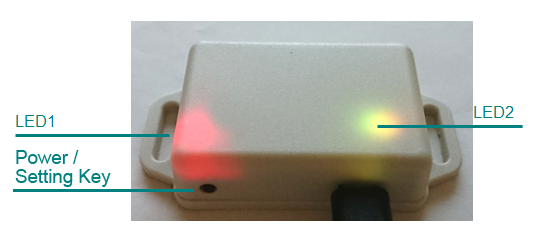
Object Type - UTAG-8141
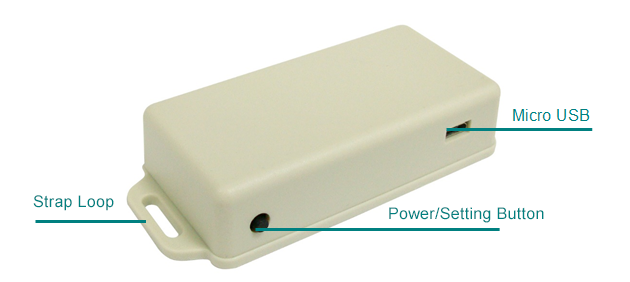
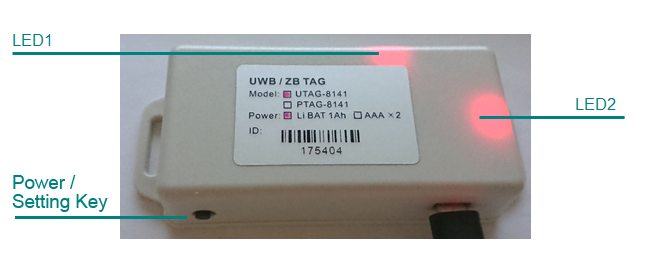
Micro USB:For Tag firmware burning
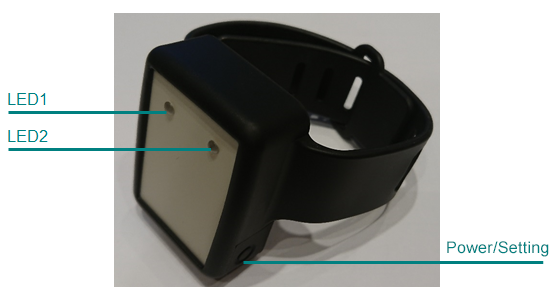
Power/Setting button: On/Off, Power, Setting, Alarm report
➤ Power ON: Under Power On/Off mode, continuously press button for about 5 seconds, LED1 light will flash 3 times with 0.5 seconds interval, buzzer will buzz 3 times with 0.5 seconds interval
➤ Power Off: Usb_dongle required to switch off the power. Continue to press button for 5 seconds to switch off the device. The buzzer will buzz with 5 beeps with 0.2 seconds interval, LED1 flashes 5 times continually
➤ Setting: Continue to hold button until LED 1flashes constantly, this indicate that the device has entered Setting. Quick press the button to exit setting mode. If the device under setting mode is untouched for 20 second, the devise will automatically exit back to standard mode
LED1:Power On/off, signal transmission and Setting indicator
LED2:Power supply indicator( Red while charging, green when full charge)
Object Type - UTAG-5136/UTAG-5136_PA
Micro USB:For Tag firmware burning
Power/Setting: On/Off, Power, Setting, Alarm report
➤ Power ON: Under Power On/Off mode, continuously press button for about 5 seconds, LED1 light will flash 3 times with 0.5 seconds interval, buzzer will buzz 3 times with 0.5 seconds interval
➤ Power Off: USB dongle required to switch off the power. Continue to press button for 5 seconds to switch off the device. The buzzer will buzz with 5 beeps with 0.2 seconds interval, LED1 flashes 5 times continually
➤ Setting: Continue to hold button until LED1 lights constantly, this indicate that the device has entered Setting. Quick press the button to exit setting mode. If the device under setting mode is untouched for 20 second, the devise will automatically exit back to standard mode
LED1:Power On/off, signal transmission and Setting indicator
LED2:Power supply indicator (Red while charging, green when full charge)
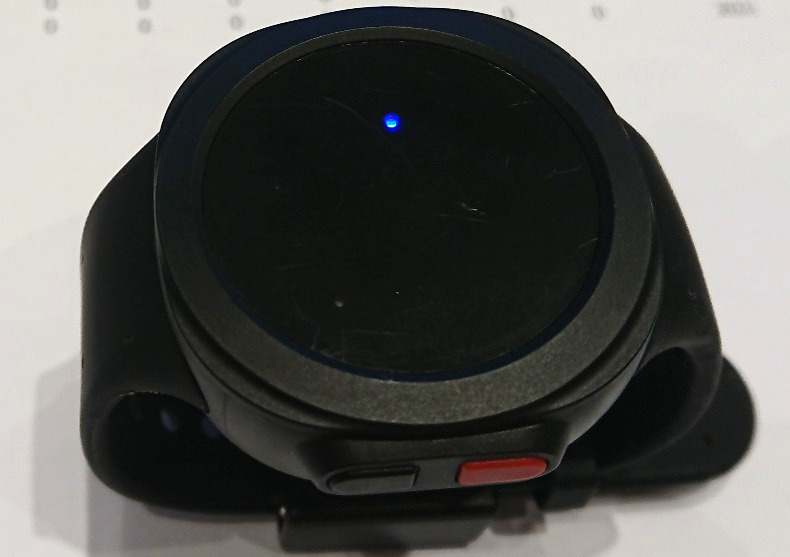
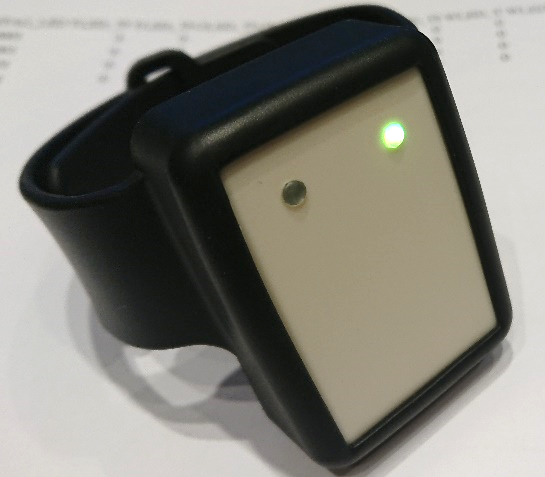
Watch Type - UTAG-H03
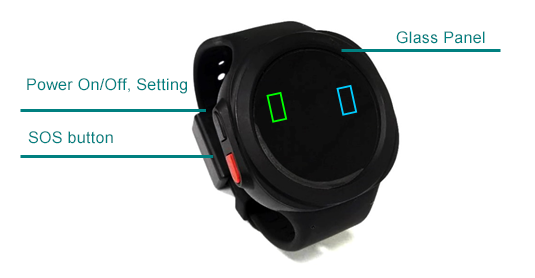
Glass Interface: No display function
Power/Setting button: Power On/Off, Setting
➤ Power ON: Hold the button for more than 5 second before release. If LED2 flashes on a 0.5second basis this indicates the device is switched on. The color of the LED changes according to different battery level
➤ Power Off: USB_dongle required to switch off device. Hold button for 5 seconds to switch off the device, the LED2 would flash 5 times with a 0.2 second interval
➤ Setting: Hold button until LED 1 and LED 2 constantly lights, this indicates the device now enter Setting. Quick press button to leave Setting. If device is left untouched for 20 seconds, it will leave Setting automatically
SOS button:Emergency alarm report
LED Indicator:Blue indicates battery level over 60%,green indicates battery level 20%-60%,red indicates battery level below 20%
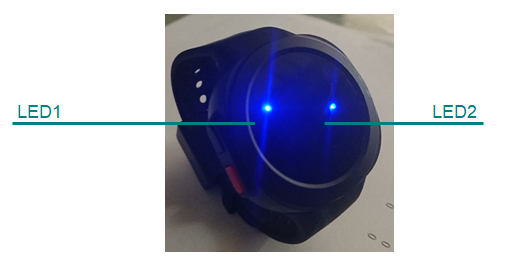
➤ LED1:Signal transmit and setting mode indicator
➤ LED2:Power indicator ( red is charging, green is full charge), Power On/Off and Setting mode indicator
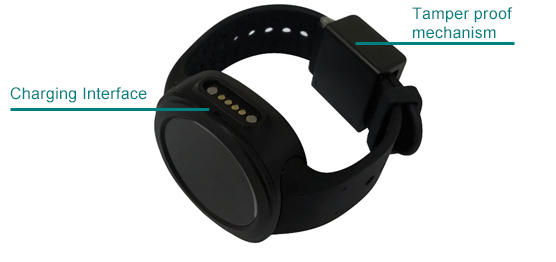
Charging interface: For the onboard battery
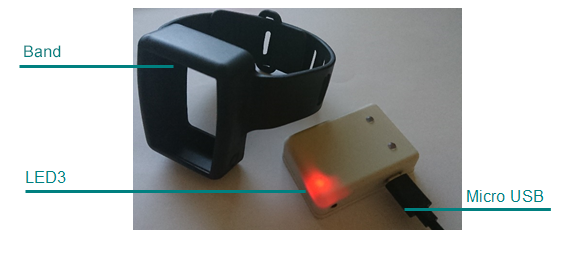
Tamper proof: Tamper proof watch band, damage detection
Power Connection
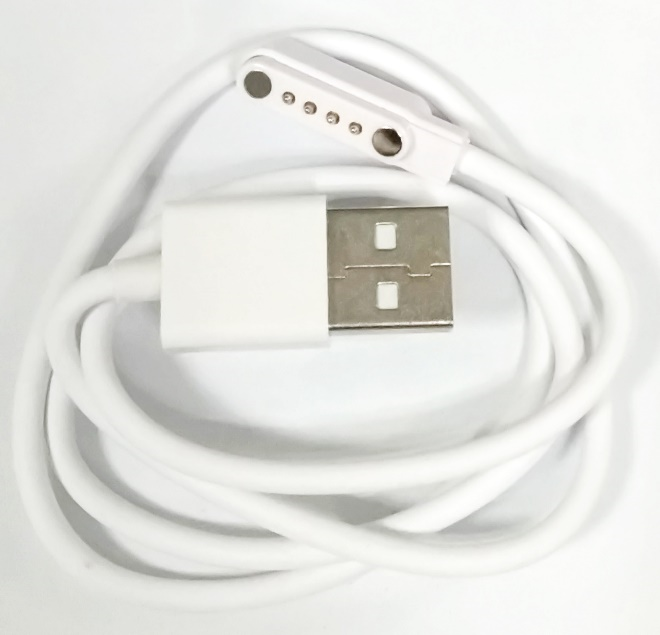
USB cable:DC 5V 2A,USB interface on one side, magnetic charger on the other side
Connecting method:
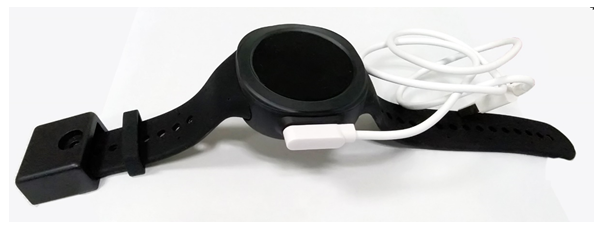
Attach the magnetic charging cable to the magnetic charging interface on the device. This device includes a mistaking proofing mechanism, it could only be attached at a single direction due to the magnetism principle.
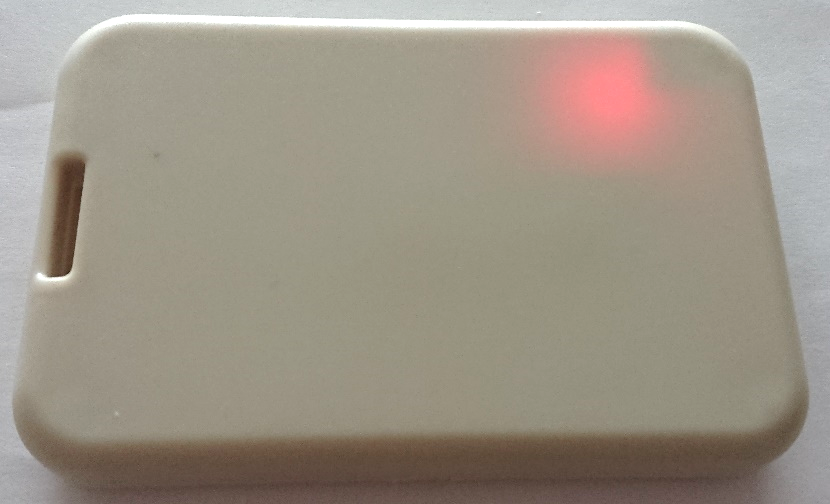
Watch Type - UTAG-H04
Micro USB:For Tag firmware burning
Power/Setting button: Power On/Off, Setting, Alarm report
➤ Power ON: Hold the button for approximately 5 second, when LED1 flashes 3 times with 0.5 second interval this indicates Tag is now turned on. Buzzer will also buzz 3 times each 0.5 second
➤ Power Off: USB_dongle required to turn off device. Hold button for 5 seconds to switch off the device, meanwhile the buzzer will “beep” 5 times with 0.2 second interval, LED1 will flash 5 times
➤ Setting: Upon power on, hold button until LED 1 constantly lights, Tag now enters setting mode, quick press again to leave setting. If device left untouched for 20 seconds, it will leave Setting automatically. Wait 1 minute after each operation
LED1:Software controlling light, remote control lighting available
LED2:Power on/off, signal transmission, setting mode indicator
LED3:Charging indicator (red is charging, green is full charge)
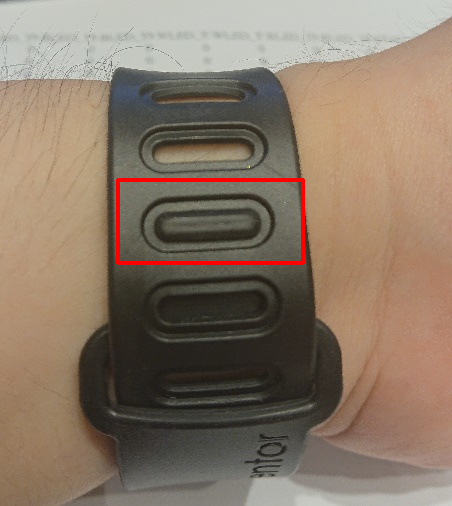
Wearing Instruction:
1. Insert band into buckle from above
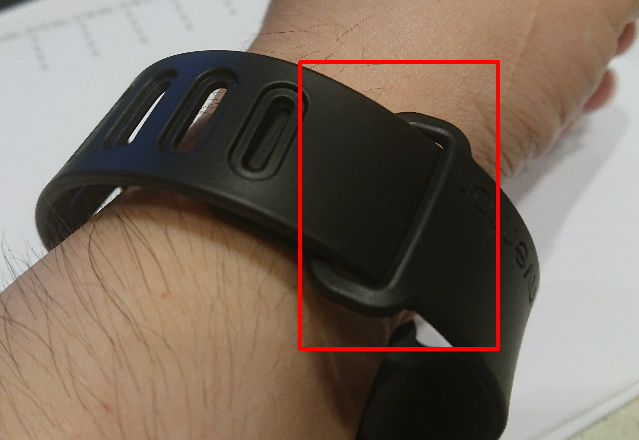
2. Pull band tight
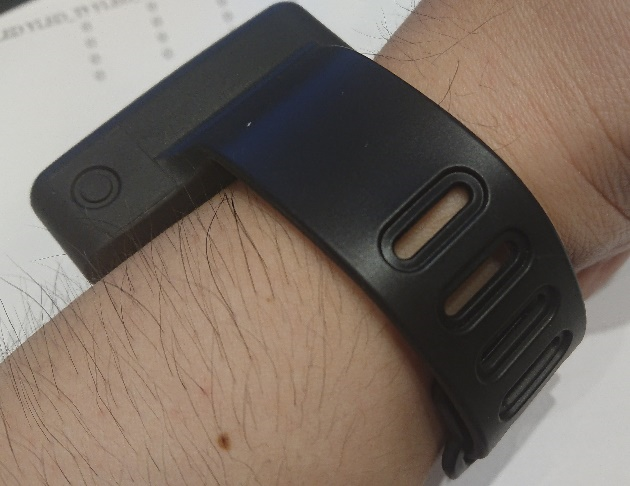
3. Secure the band
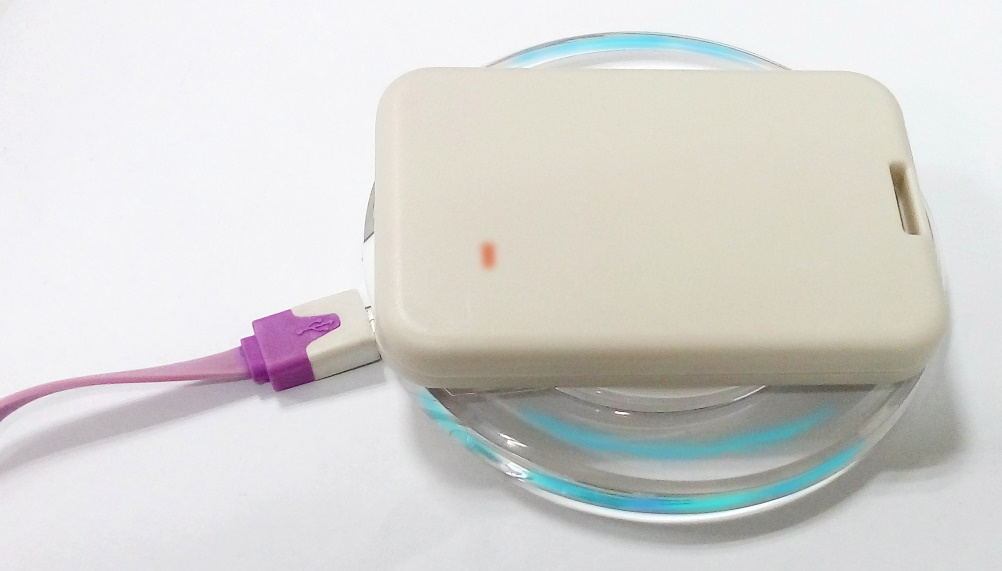
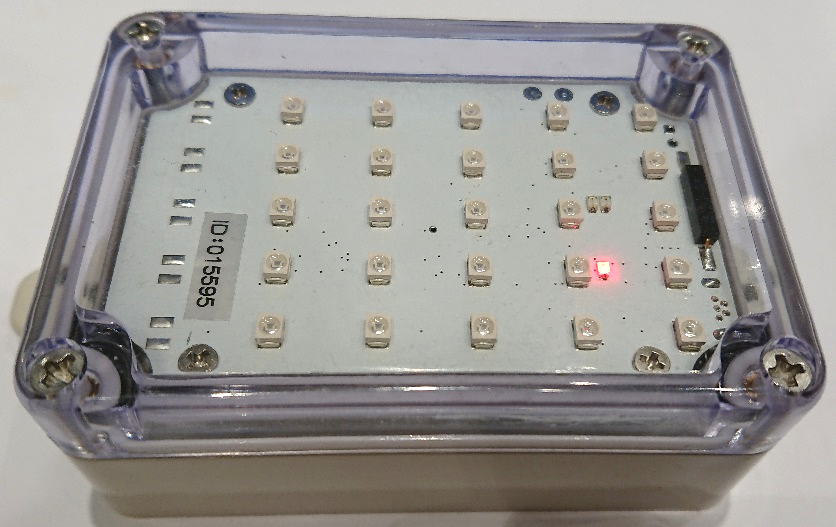
Waterproof - UTAG-9060WPC,Protection level:IP65
Magnet
Micro USB plus:For firmware flashing. As it is internal within Tag, please use OTA method to update firmware. Please refer to appendix 2 for more information
Reed switch: UATG-9060 uses magnet to turn it on and off. The magnetic reed switch could be found at the bottom of the Tag, opposite from the hanging hole. LED2 will light up when magnet gets close to magnetic reed, lights off when magnet removed
➤ Power ON: Bring magnet close to magnetic reed switch, LED2 will flash 3 times with 0.5 second interval after 5 seconds, which indicates Tag is now turned on
➤ Power Off: USB_dongle required to turn off device. Bring magnet close to magnetic reed switch, device will be turned off after 5 seconds, meanwhile LED 1 flashes 5 times with 0.2 second interval
➤ Setting: Upon power on, bring magnet close to magnetic reed until both LED1 and LED 2 light to enter Setting mode, bring magnet close to magnetic reed to leave this mode. If device left unoperated for 20 seconds, it will leave Setting automatically. Wait 1 minute after each operation
LED1:Magnetic reed turn on/off, signal transmission, setting mode indicator
LED2:Turn off, setting mode indicator
LED3:Wireless charging indicator
Wireless Charger
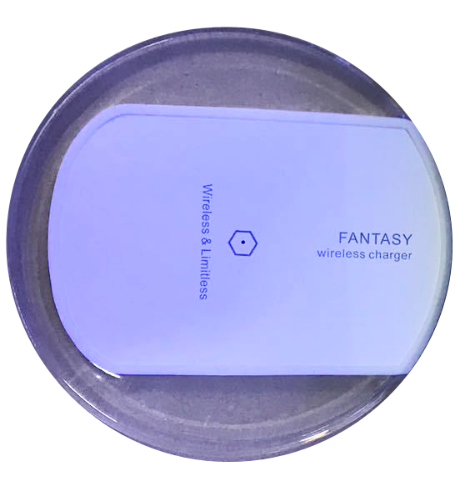
Charging Instruction:
1、Connect wireless charger to cable, indicator at middle will flash red for twice to show that the unit is working

2、Place UTAG-9060WPC Tag on wireless charger to start charging. The charging indicating light would become blue upon successful charging