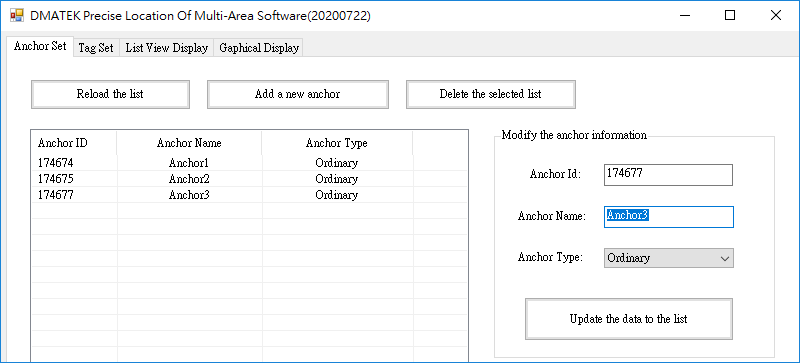
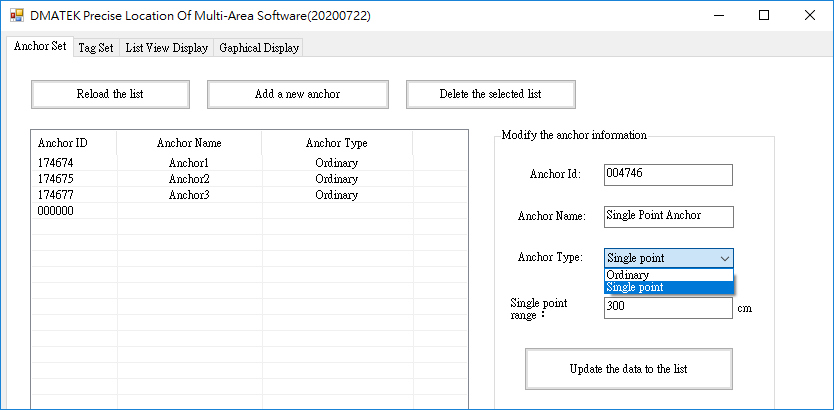
After opening the positioning software, select the Anchor Set tab. Here you can set the alias of the Anchor, or set the positioning type of the Anchor, such as single-point positioning or three-point positioning. The following will be explained separately
Alias Setting
A. Click the Add a new anchor button to add an Anchor device, where the button function represents
➤ Reload the list: Reload the Anchor setting list, load the Anchor list saved in the configuration file
➤ Add a new anchor: Added setting of Anchor equipment.
Note that users cannot add settings without clicking
➤ Delete the selected list: Delete the selected Anchor settings.
Note that the user must first click on the list list
B. Fill in the fields in Modify the anchor information on the right, the fields are described as follows
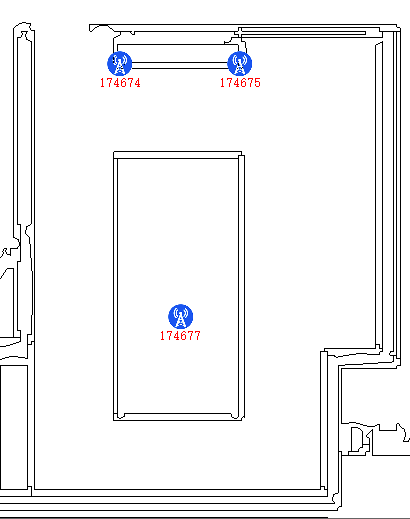
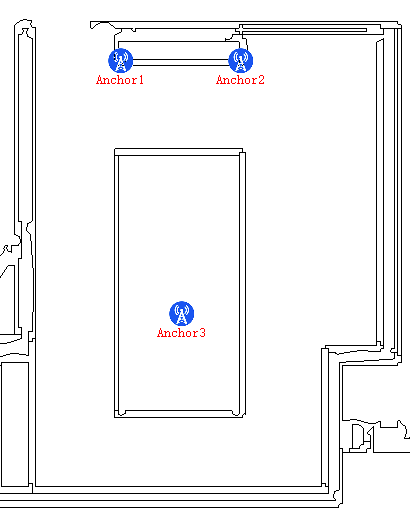
➤ Anchor Id:Anchor ID
➤ Anchor Name: Anchor alias
➤ Anchor Type: Positioning type, which will be explained later
C. After filling in, click the Update the data to the list button to save the settings. The settings here will be directly displayed on the fields of the list display and graphic monitoring
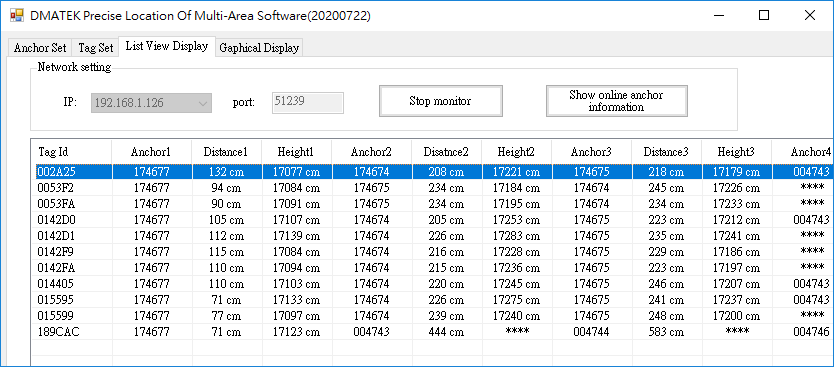
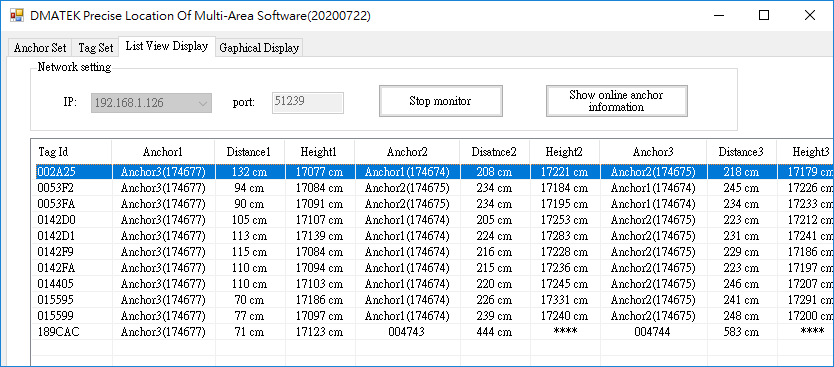
List Display
Graphical Monitoring
Single-point positioning feature Anchor setting
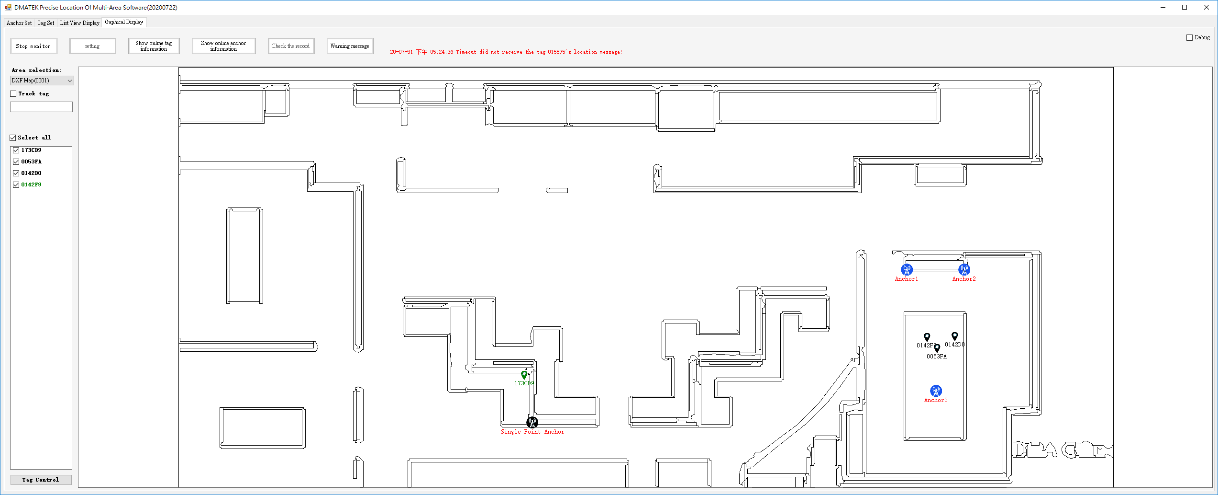
This function is only for graphics monitoring. Note that the single-point positioning Acnhor means that the tag is a single-point positioning within the set range. If the tag is out of the single-point anchor range, the single-point positioning anchor is still a three-point positioning anchor for the tag. The operation is as follows
A. Add a new anchor button to add Anchor settings
B. Fill in the field on the right and select the Single point item in the Anchor Type field
➤ Ordinary:General positioning type, that is, three-point positioning
➤ Single point:Single-point positioning type
C. At this time, there will be an extra Single point range field below the field. Here is the detection range radius of the single-point positioning Anchor. Fill in the required radius value as required, in cm
D. After filling in, click the Update the data to the list button to save the settings
Before starting graphic monitoring
We can see that the single-point positioning Anchor component is black, and a black circle shows the scope of its single-point positioning
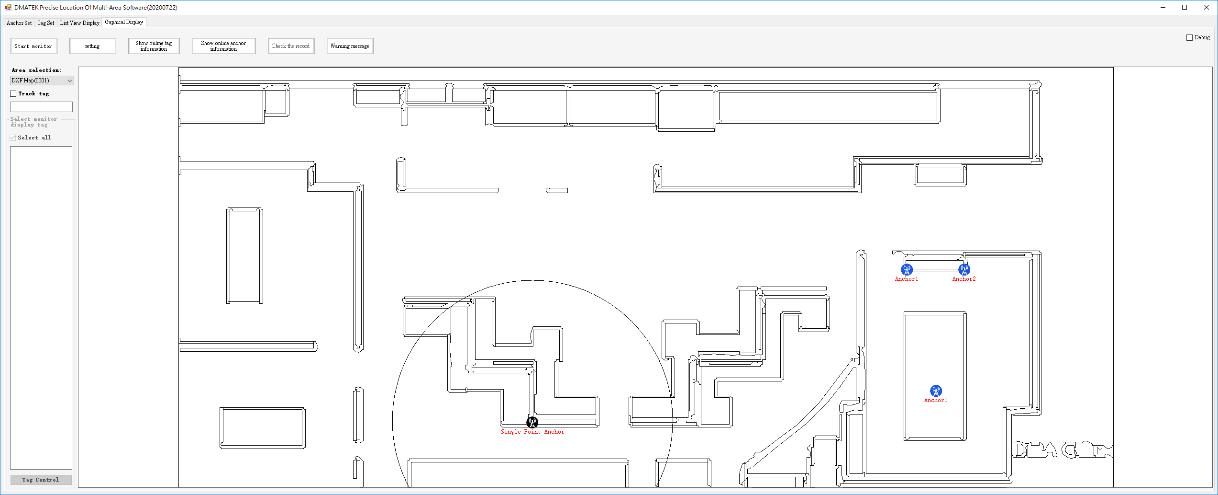
After starting graphic monitoring
We can see one of the tags near Acnhor. Note that tags will be randomly displayed within the detection range of the single-point positioning Acnhor. If the tag holder walks around for testing, the administrator will find that the tag display points will be randomly displayed around the Acnhor component. The normal position will not be displayed until the tag is out of the detection range. Of course this display mechanism can be changed by modifying the code