A simple example is provided below to illustrate how to build a UWB precision positioning system.
Positioning Equipment and Hardware Specification.
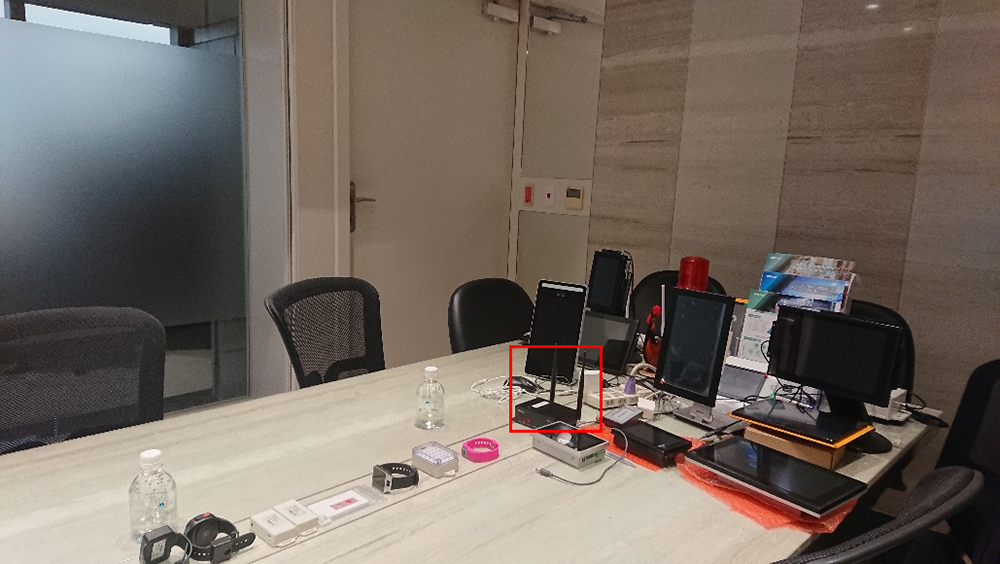
Scenario A - Conference room
Environment Overview
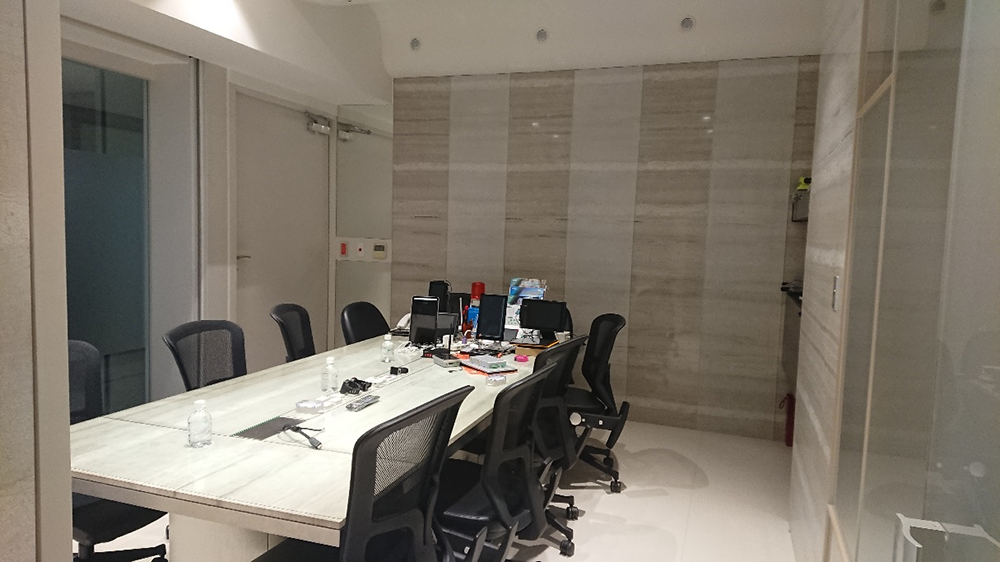
This conference room has a dimension around 4m x 6m (24m2) in size. There will be 3 anchors deployed for this demonstration(minimum amount required for trilateration positioning). While going through the deployment details, we will also be covering critical information’s such as environmental setup and parameter configuration, followed by instructions on performing a complete TAG monitoring using this DMATEK precise positioning software.
Anchor Installation
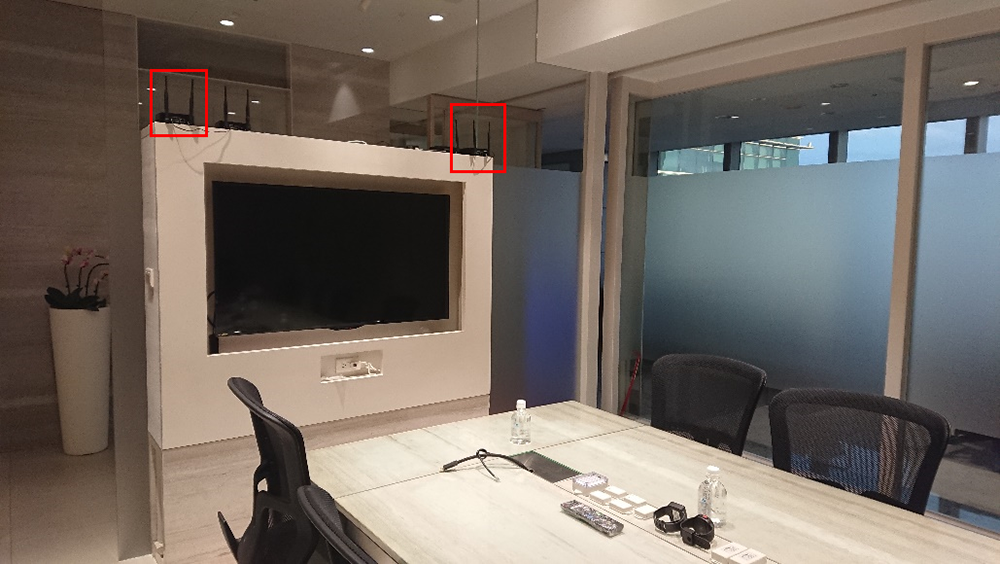
In this scenario we are not able fulfil the optimal configuration of trilateration setup due to the restricted spaces. But here is some ideal recommendation:
• Wall and anchors need a minimum of 30cm in separation
• A higher height to avoid LoS obstruction AND leveled at the same height
• Specially at a 30m x 30m area, trilateration is preferred (equilateral triangle shape)
Location MAP
We are using a self-drawn map for demonstration purpose. For the precise positioning system only DXF or DEG format files are applicable. Thus, this map was converted beforehand.
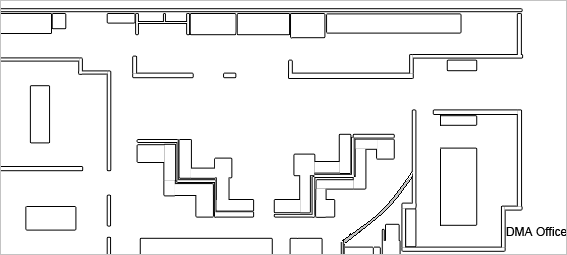
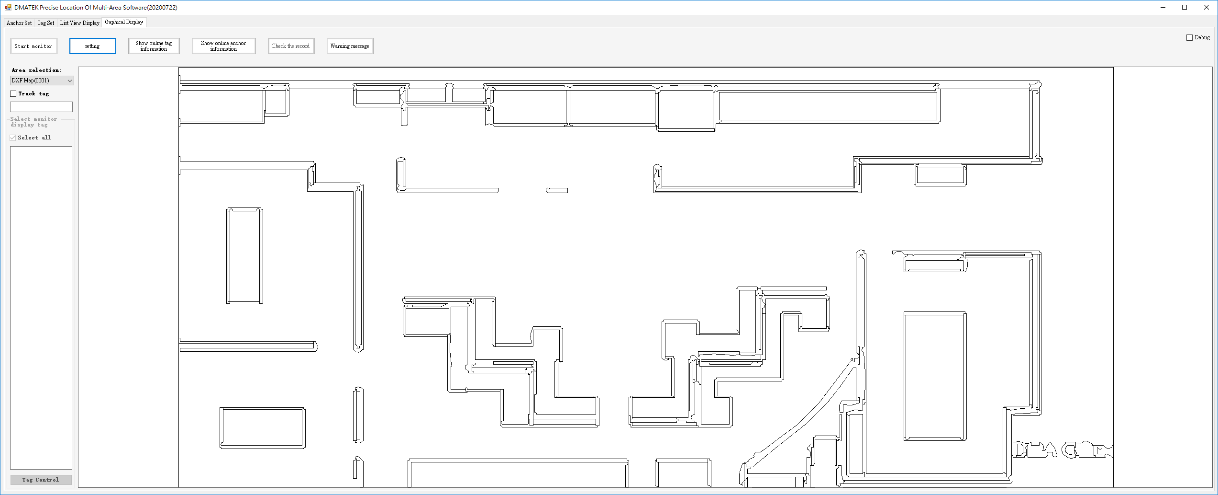
The following figure shows the display result of a vector map.
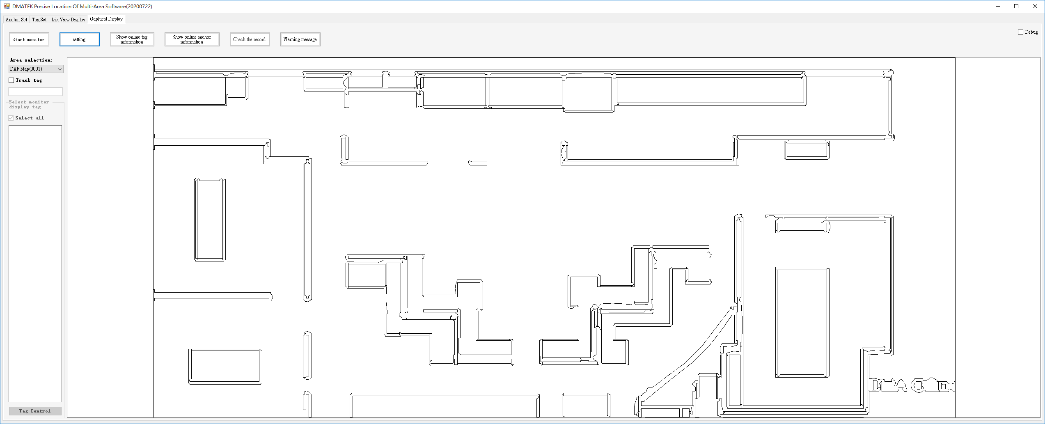
The display result will look better if an architectural drawing is used.
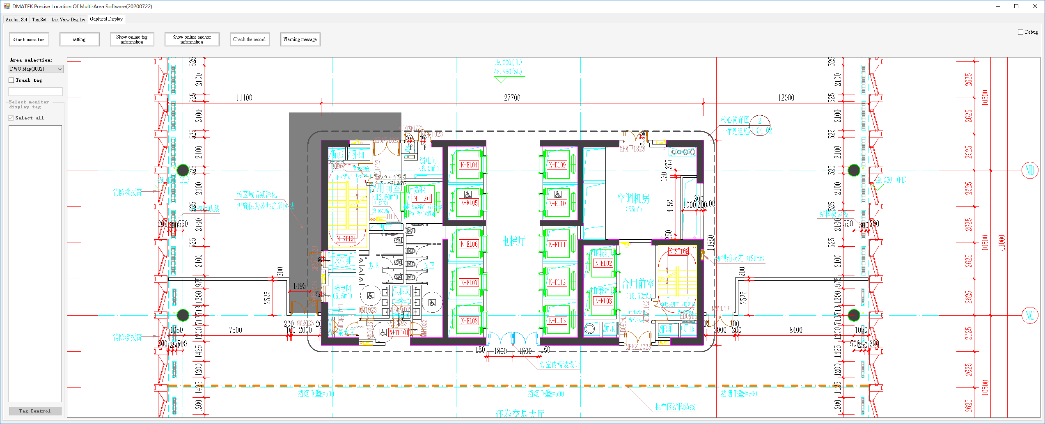
*Attention: To avoid display error of achitectural drawing, please insert the actual dimension
Positioning Equipment and Environment Configuration
Server IP
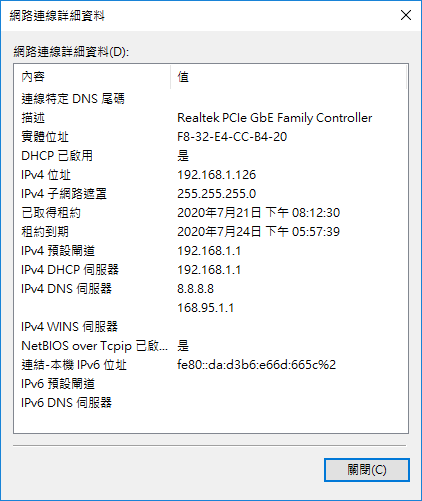
First Confirm the IP of the device for running the monitoring software
A. To navigate to the menu below, please following these steps
Control panel → Network and Internet → Network Status and tasks → Connections → Details
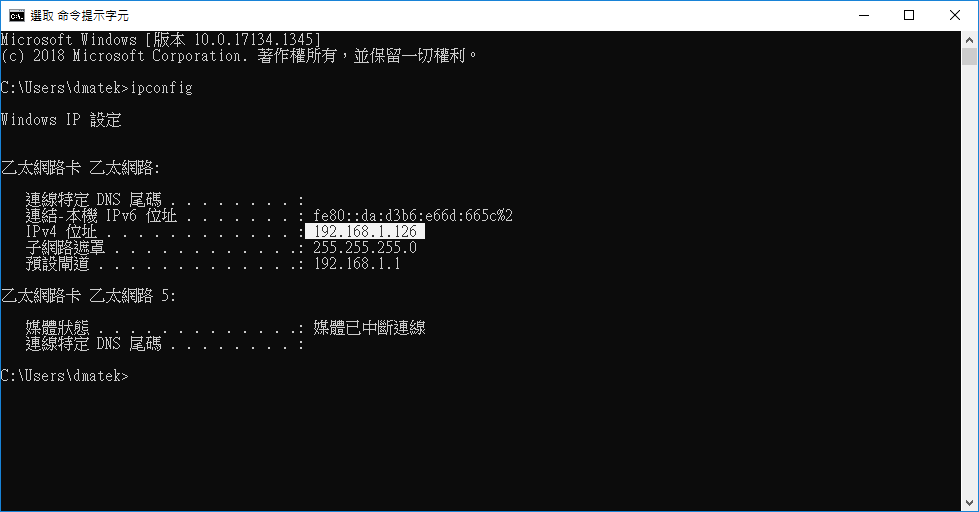
B. Alternatively, you can type “ipconfig” in the command prompt to retrieve IP information
Enable ICMP
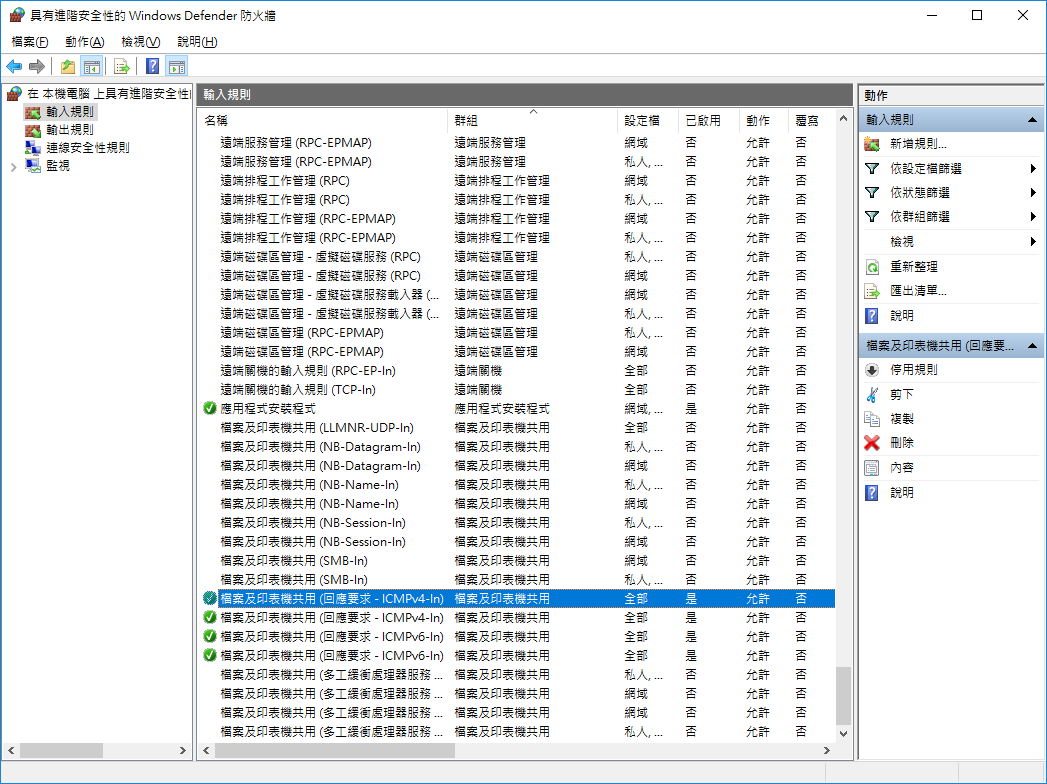
When the anchor is powered on, it will first try to ping the server IP to confirm whether the transmission destination exists or not. Thus, please make sure the anchor and the device use the same network and ICMP is enabled as well.
Windwos Defender Firewall → Advanced Setting → Inbound Rules → File and Printer Sharing (Echo Request – ICMPv4 -In) → Enable Rule
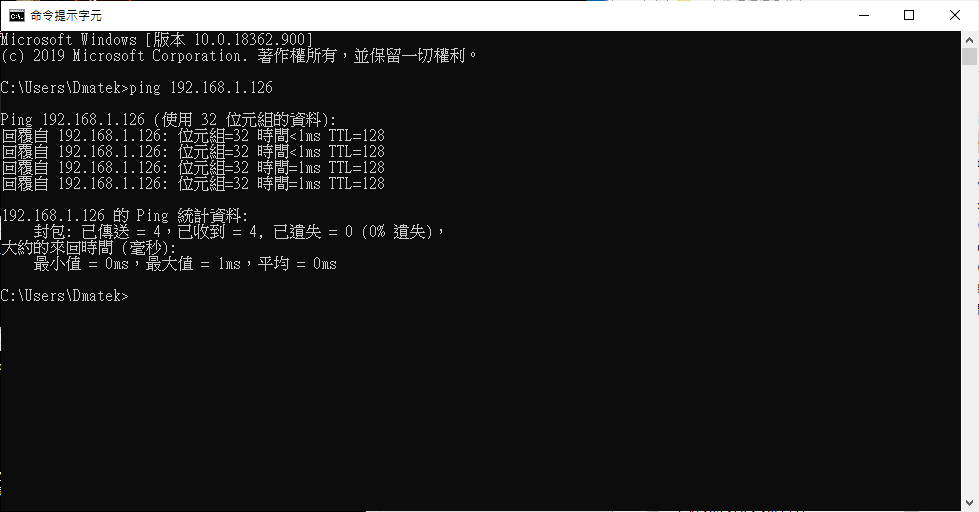
Attention: Some antivirus software will block ICMP packet be default to prevent netwrok attacks. To avoid that, you can use other device to the ping the running device IP to whether it responds to the ICMP packets.
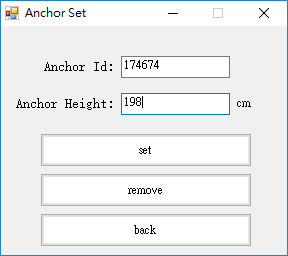
Parameter configurations for the anchor
Setup and confirm the network parameters of the anchor .
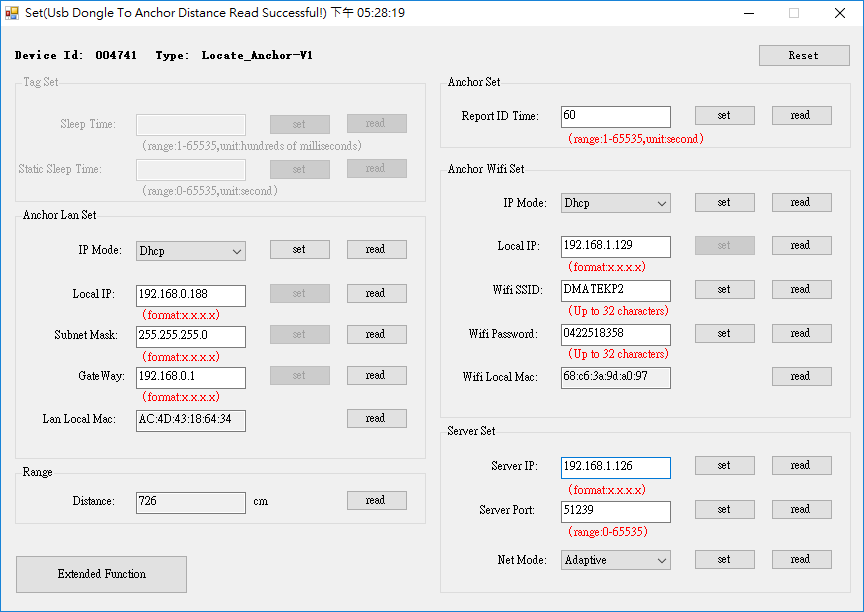
*Attention: To apply the setting click Reset to achknowledge.
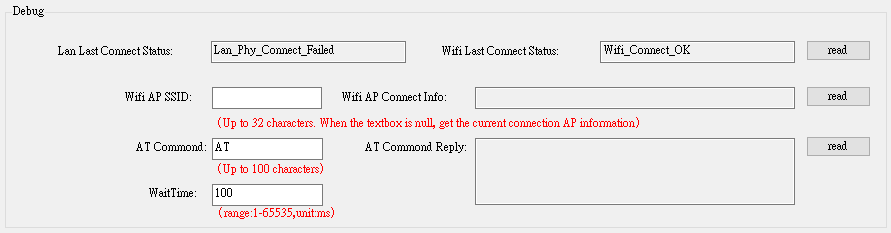
Users can refer to the Debug function understand Extended Function to monitoring the network connection status too.
Monitoring Software Testing
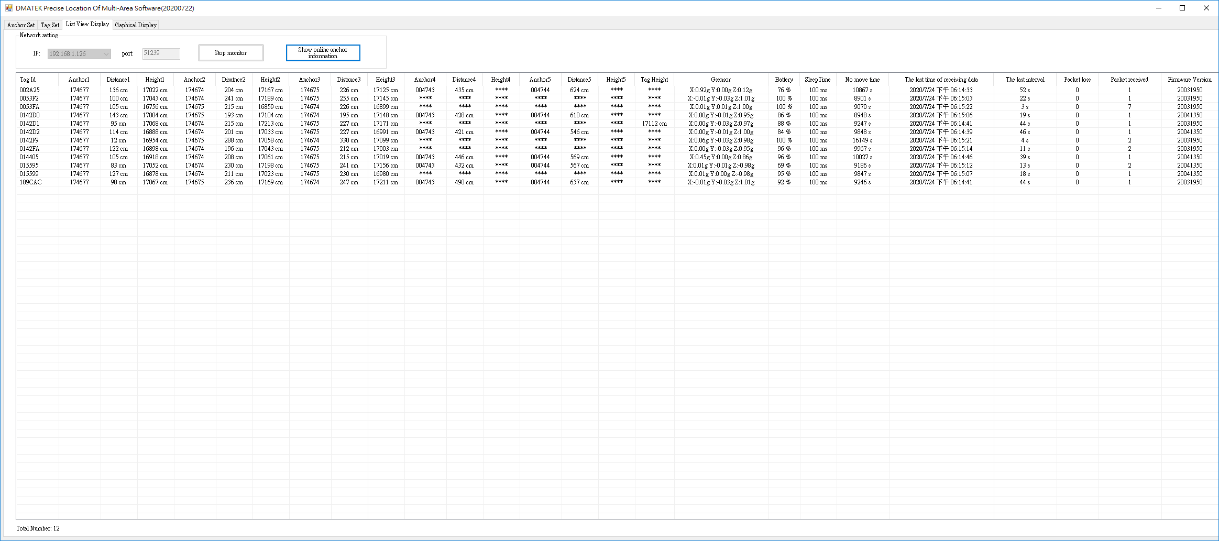
Communciation confirmation for the location packet
Execute the positioning software using PrecisePosition.exe. Locating Software. Select List View Display menu and insert the UP and communication protocol (Value needs to be the same as the anchor) and click start monitoring to receive location packet. As long as the anchors are operating correctly and there are nearby TAG devices, the list under this menu will be displaying the live status of the TAG. Hereby we can confirm the location packet has been received correctly.
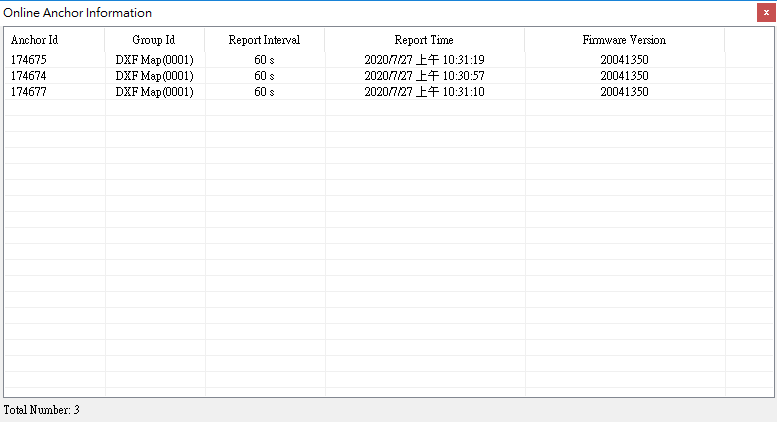
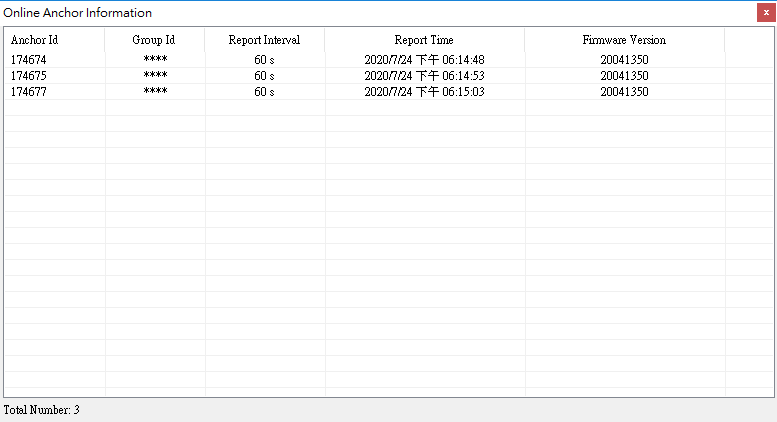
Click Show online anchor information to check whether the anchor is functional or not.
Locating Software and its setting
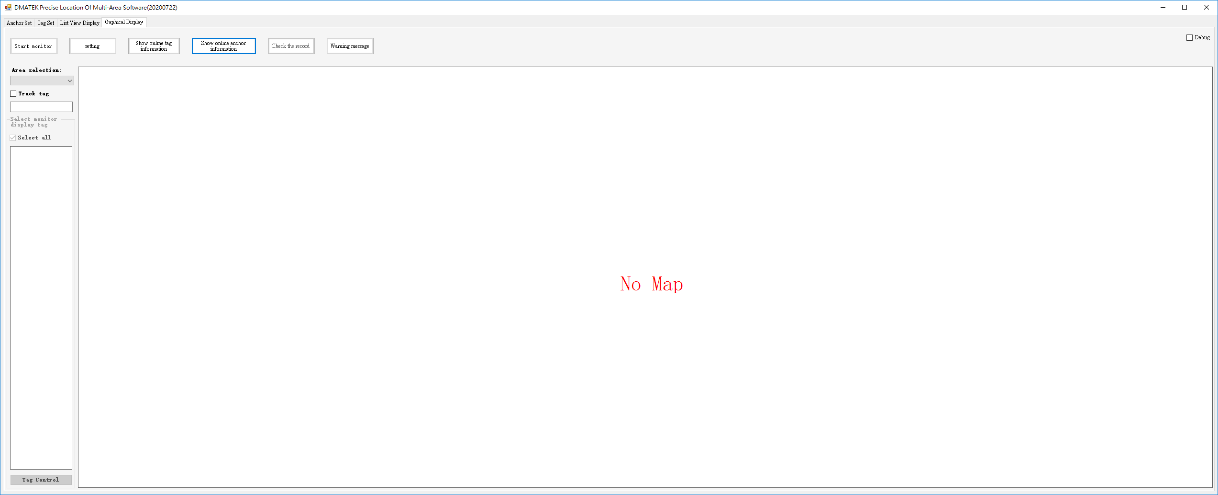
Next, we will be demonstrating a graphical display monitoring testing. To begin, start off with selecting the Graphical Display Menu. For the first time, please configure the network settings and map.
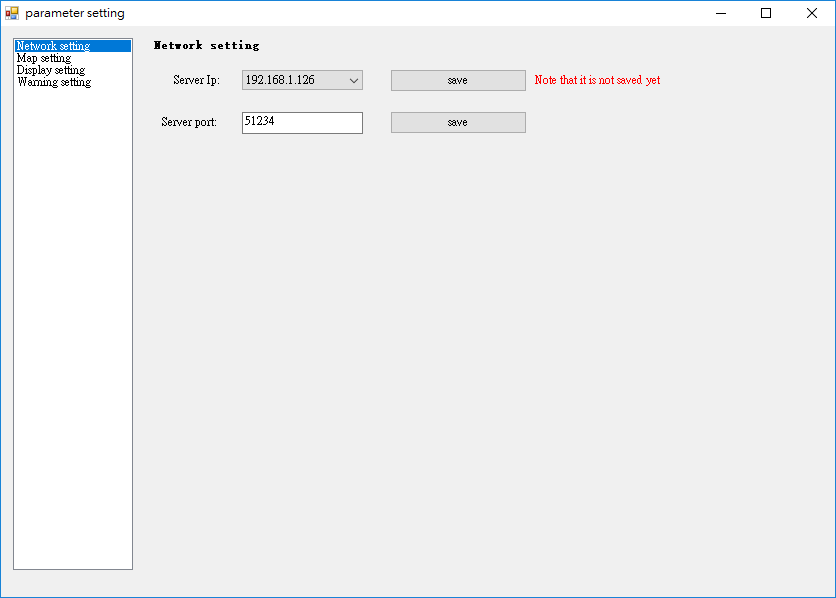
Next, click setting and under the Network Setting menu, inser the value for the Server ip and port (make sure the values are the same as the anchor). Please take note that the default setting may not be the same as shown, remember to click save to store your setting.
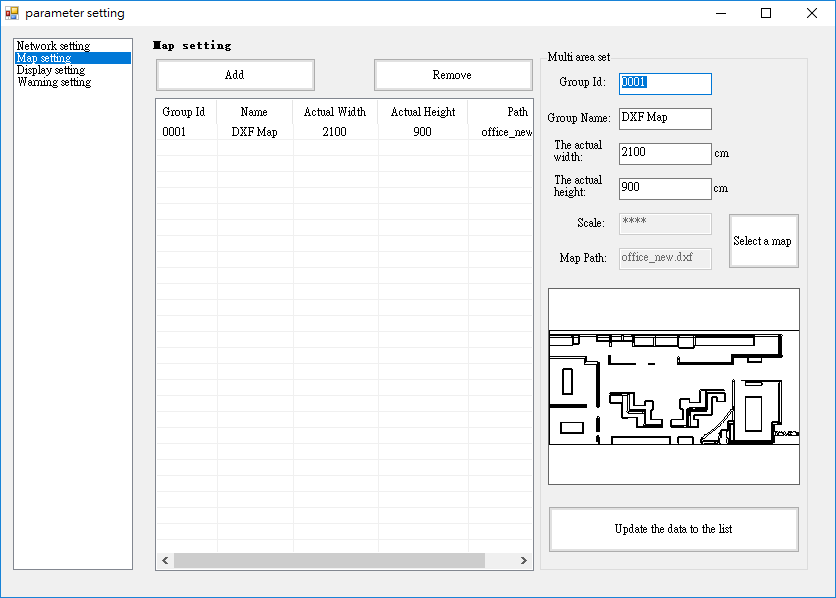
Moving towards the Map setting menu. To configure the map use for monitoring, click Add to import a map and fill in the following value for the vector map. Once complete click “Update the data to the list” to store valus for the new map.
Closed the window and you should expect to the see the map that just imported.
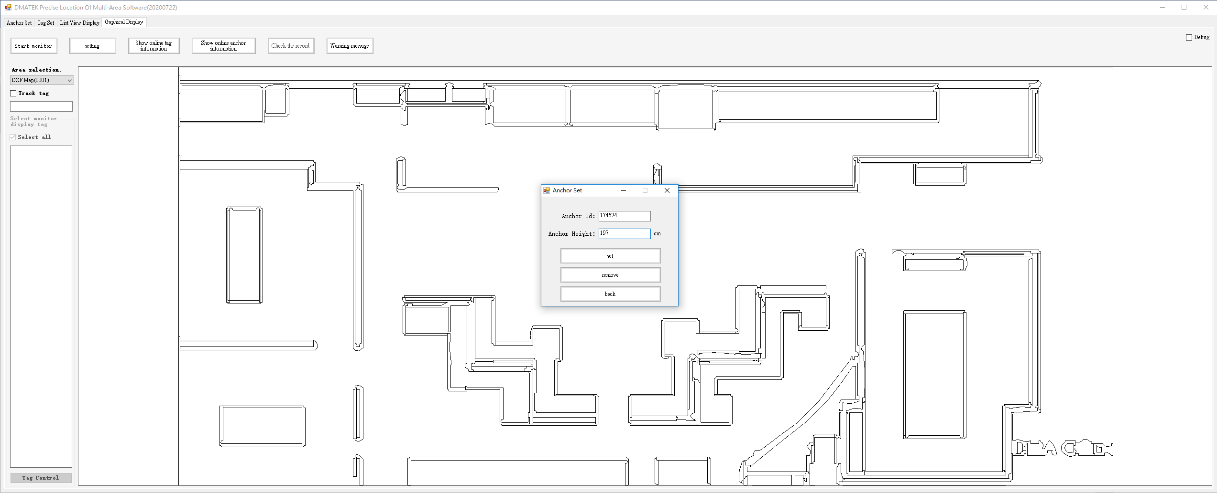
Testing the locating software
A. Double click one the map to add location for the new anchor
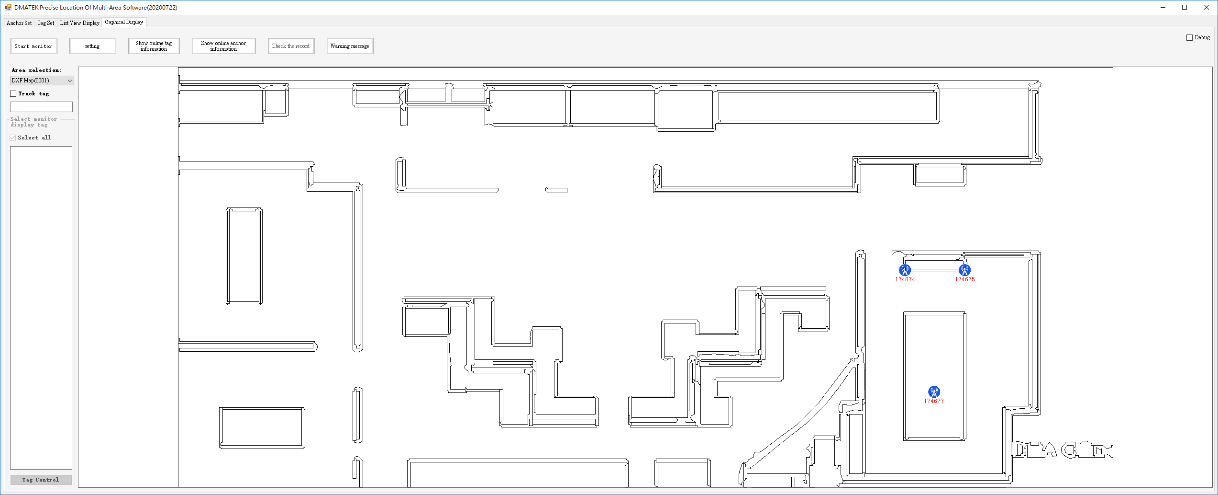
B. Click Start monitor to monitor TAG’s on the map.
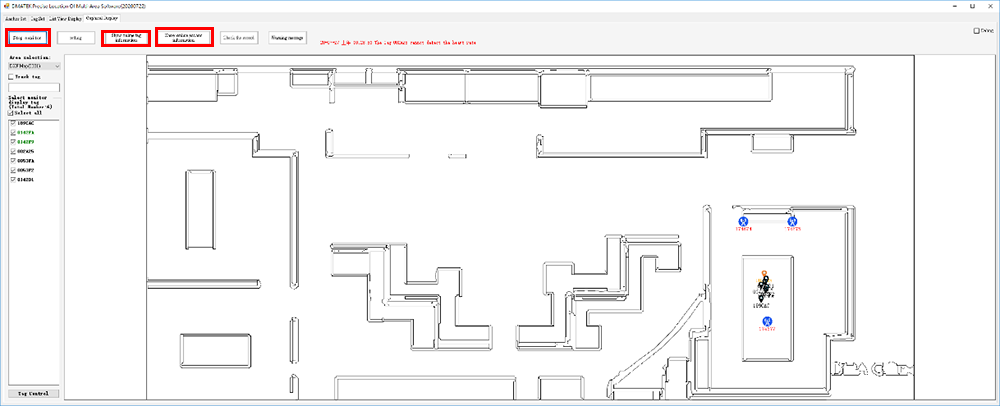
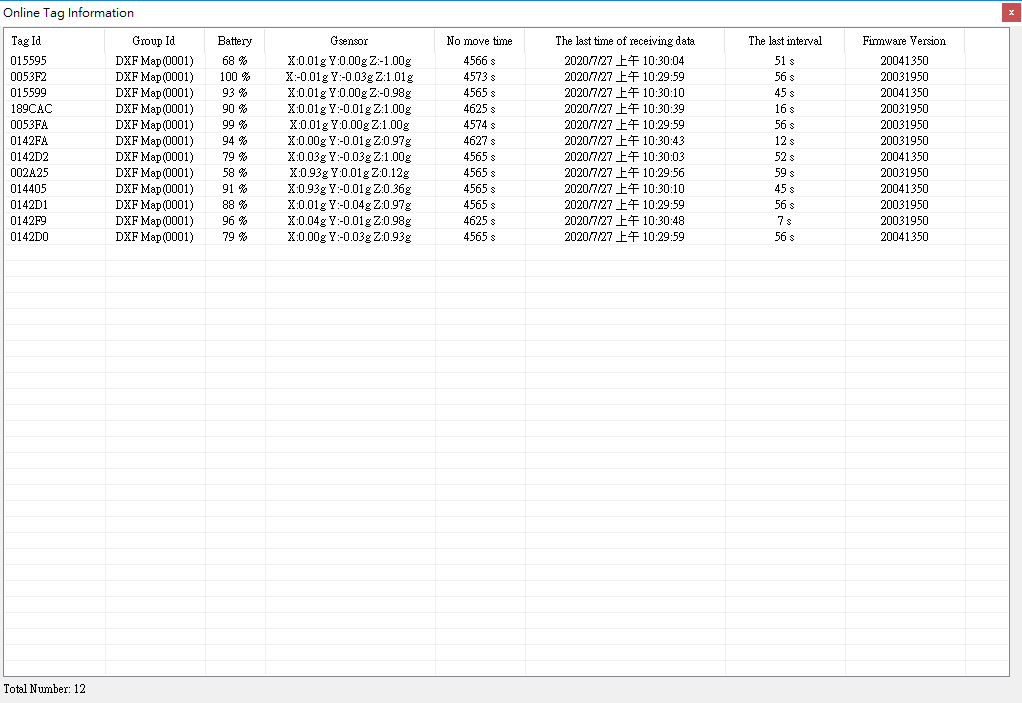
C. Click Show online tag information to access the list of TAG online and click Show online anchor inforamtion to access the list of anchor’s online.